Understanding Programmable Thermostats
What Is a Programmable Thermostat?
A programmable thermostat is an electronic device designed to automatically adjust your home’s temperature based on a pre-set schedule. Unlike manual thermostats where you adjust the temperature yourself throughout the day, programmable thermostats allow you to customize different temperature settings for various times and days. This means you can have your home warmer in the morning, cooler during the day when no one is home, and comfortable again by the time you return.
These devices are ideal for managing heating and cooling systems efficiently because they reduce unnecessary energy use when comfort is not essential, such as during sleep or extended absences. By adapting to your lifestyle, programmable thermostats help maintain comfort while optimizing energy consumption.
Benefits of Using a Programmable Thermostat
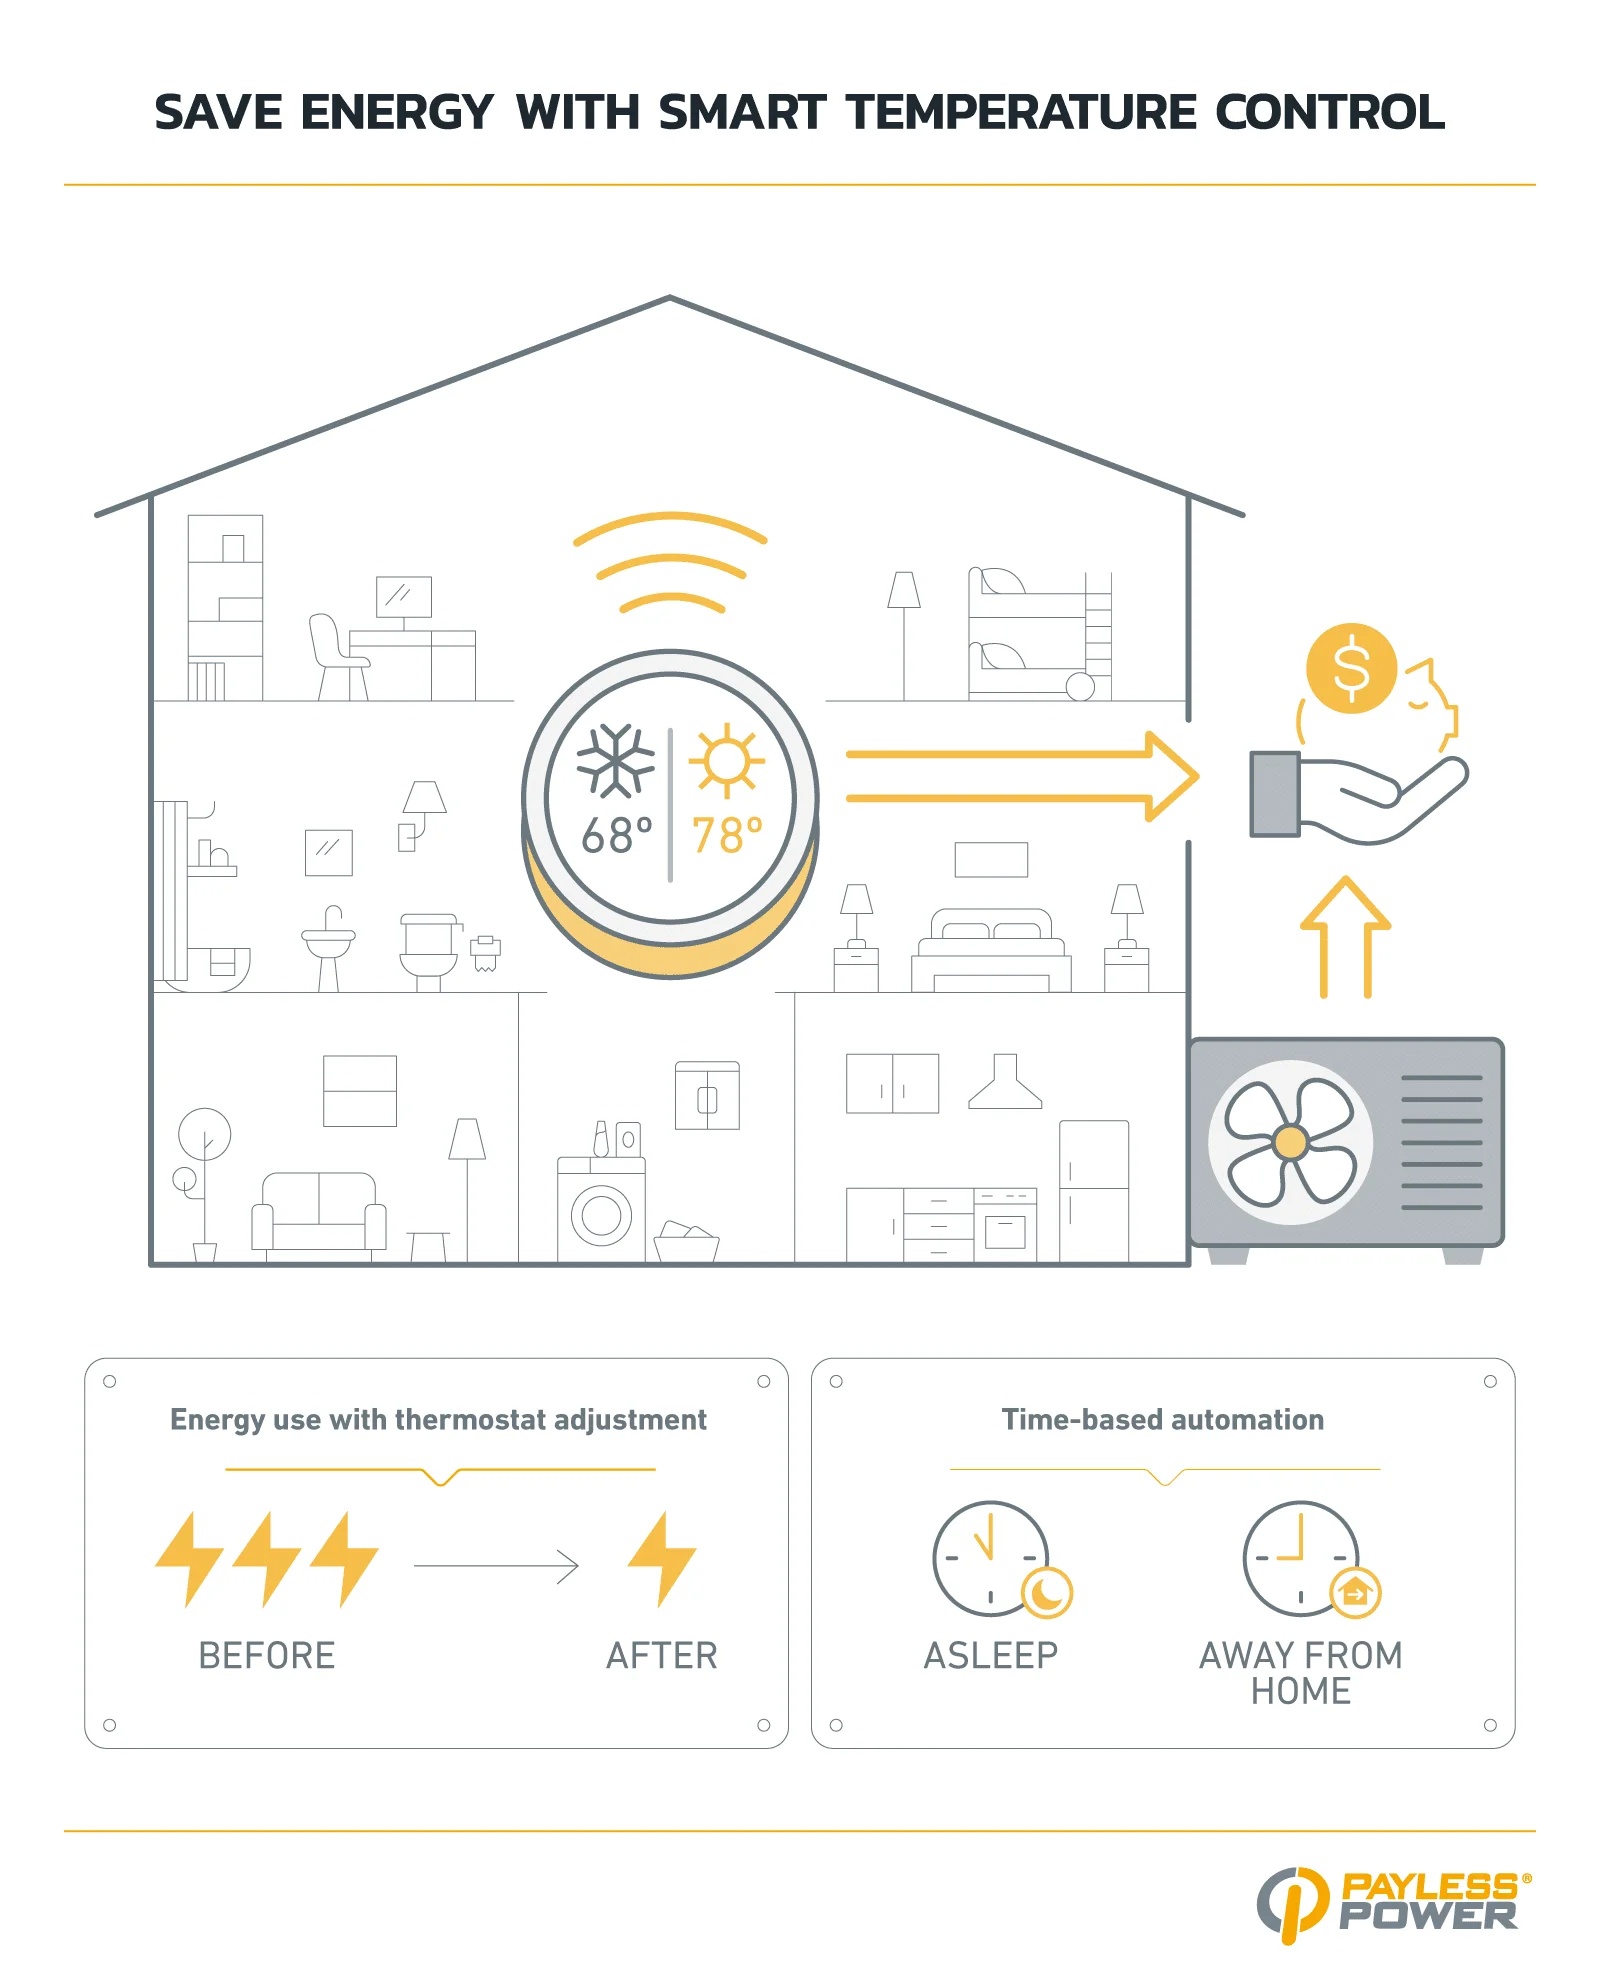
Using a programmable thermostat offers multiple advantages. First and foremost, it helps save energy by reducing heating or cooling when it is not needed. For example, lowering the thermostat 7°-10°F for about eight hours each day during sleep or when the house is empty can save up to 10% annually on heating and cooling costs. This automated approach eliminates the risk of forgetting to adjust the thermostat manually.
Additionally, programmable thermostats help extend the lifespan of your heating and cooling systems by reducing the frequency and intensity of their operation. They also enhance overall comfort by enabling precise temperature schedules customized to your household’s routines. For heat pump systems or electric resistance heating, using compatible programmable thermostats can improve efficiency and prevent backup heat overuse.
Preparation Before Installation
Tools and Materials Needed
Before starting the installation, gather essential tools and materials to make the process smooth and safe. You will need a screwdriver set to remove the old thermostat and mount the new one. A drill may be necessary if the new thermostat requires additional mounting holes. A voltage tester helps ensure the power is off before handling wires, preventing electric shock. Additionally, having wire labels or tape can help identify wires for proper reconnection. Finally, refer to the installation manual for your particular thermostat model to confirm any additional tools or hardware required.
Safety Precautions to Follow
Safety is paramount when working with your heating or cooling system’s wiring. First, turn off the power to your furnace or air conditioner at the main electrical panel or breaker box to avoid electric shock. Use a voltage tester to verify that no current is flowing before you begin working. Never assume the wires are safe to touch without confirming. Avoid touching more than one wire at a time, especially if unsure about their purpose. Wear insulated gloves if available, and keep the working area dry and free of clutter to prevent accidents.
Step-by-Step Installation Guide
Removing the Old Thermostat
Begin by carefully removing the cover or faceplate of your existing thermostat. Most covers snap off or unscrew easily. Once exposed, take a photo or label each wire connected to the thermostat terminals. This step is crucial for ensuring correct wiring of the new programmable thermostat. Next, unplug or unscrew the wiring terminals, and remove the thermostat base from the wall. Be gentle to avoid damaging the thermostat wires or wall surface.
Wiring the New Programmable Thermostat
With the old thermostat removed, examine the new device’s wiring instructions. Match the labeled wires to their corresponding terminals on the new thermostat base. Most thermostats have standardized terminal letters such as R for power, W for heat, Y for cooling, and G for fan. Secure each wire under its terminal screw, ensuring a solid connection without loose strands. For heat pumps and electric resistance heating, it is important to use thermostats designed for those systems to ensure proper control and avoid excessive backup heating.
Mounting and Securing the Device
After wiring, mount the thermostat base securely on the wall using the provided screws. Make sure it is positioned on an interior wall, away from direct sunlight, drafts, doorways, and furniture that could interfere with accurate temperature sensing. Avoid placing it near windows, skylights, or heat-generating appliances. Once the base is attached firmly, snap or screw the thermostat faceplate onto the base. Double-check that everything is stable and flush to the wall for consistent functionality.
Setting Up Your Programmable Thermostat
Programming Temperature Schedules
Once installed, the next step is to program your thermostat according to your daily routine. Most programmable thermostats allow you to set multiple time periods throughout the day—for example, morning, daytime, evening, and night—with different temperature targets for each. Start by establishing a comfortable temperature, typically around 68°F to 70°F during awake periods in winter and 75°F or higher in summer. Then, set lower temperatures for sleep times or when the house is unoccupied to maximize savings.
If you have heating systems with slow response times like steam or radiant floor heating, program the thermostat to begin temperature changes well before usual occupancy or wake-up times. This anticipatory scheduling prevents discomfort and inefficient heating. Also, consider household members’ differing schedules and adjust the programs accordingly, using manual overrides when necessary for unexpected changes.
Utilizing Advanced Features for Maximum Savings
Many programmable thermostats come with advanced features such as adaptive algorithms, remote access via smartphone apps, and energy usage reports. For homes with heat pumps, choosing thermostats with algorithms designed to reduce reliance on inefficient backup heating can be highly beneficial. These thermostats learn the system’s response time and adjust setbacks to minimize energy waste.
Remote control capability allows you to adjust settings remotely, ensuring the home is always comfortable upon arrival without wasting energy during absence. Use energy reports to monitor how your settings impact consumption and fine-tune programming for even greater savings. Additionally, some thermostats offer vacation modes that maintain energy-saving temperatures for extended periods away from home.
Energy-Saving Tips Post-Installation
Optimal Temperature Settings for Different Seasons
To maximize energy savings year-round, adjust your thermostat settings according to seasonal needs. In winter, keep the thermostat around 68°F to 70°F when you are awake, lowering it by 7° to 10°F during sleep or when away from home. Starting the setback temperature a bit before bedtime can help you enjoy cooler sleeping conditions without sacrificing comfort.
During summer, maintain a warmer indoor temperature when the house is empty to reduce air conditioning use. Set the thermostat to a comfortable higher temperature upon return. Avoid setting the thermostat colder than necessary to cool the home faster, as this does not speed up cooling but increases energy consumption. Tailoring settings based on occupancy patterns ensures that energy is not wasted during unoccupied periods of four hours or more.
Regular Maintenance to Keep Thermostat Efficient
Maintaining your programmable thermostat is important for consistent performance. Periodically clean the device and ensure the sensor is free of dust or debris that could affect accuracy. Check that the batteries, if applicable, are replaced promptly. Review your programmed schedule periodically to accommodate changes in routine or seasons. Avoid placing furniture or curtains in front of the thermostat, which can block airflow and cause inaccurate temperature readings. Proper placement and upkeep help prevent unnecessary cycling and reduce energy waste.
Common Troubleshooting Issues
Thermostat Not Responding
If your programmable thermostat does not respond, first confirm that power is restored to the heating and cooling system. Check the circuit breaker or power switch and replace batteries if the device uses them. Resetting the thermostat to factory settings can sometimes resolve software glitches. If the problem persists, inspect the wiring connections to ensure they are secure and correctly installed. Consult the user manual for any model-specific troubleshooting steps or error codes.
Inconsistent Temperature Control
Inconsistent temperature control can stem from several factors. Inaccurate thermostat placement—such as exposure to direct sunlight, drafts, or proximity to appliances—can cause faulty readings and excessive cycling. Verify that the thermostat is located on an interior wall away from these influences. For heating systems like steam or radiant floors, account for their slow response by programming setbacks to start earlier. If a heat pump is involved, ensure the thermostat has proper algorithms to prevent frequent switching to backup resistance heat. Regular calibration or professional inspection may also resolve persistent issues.

