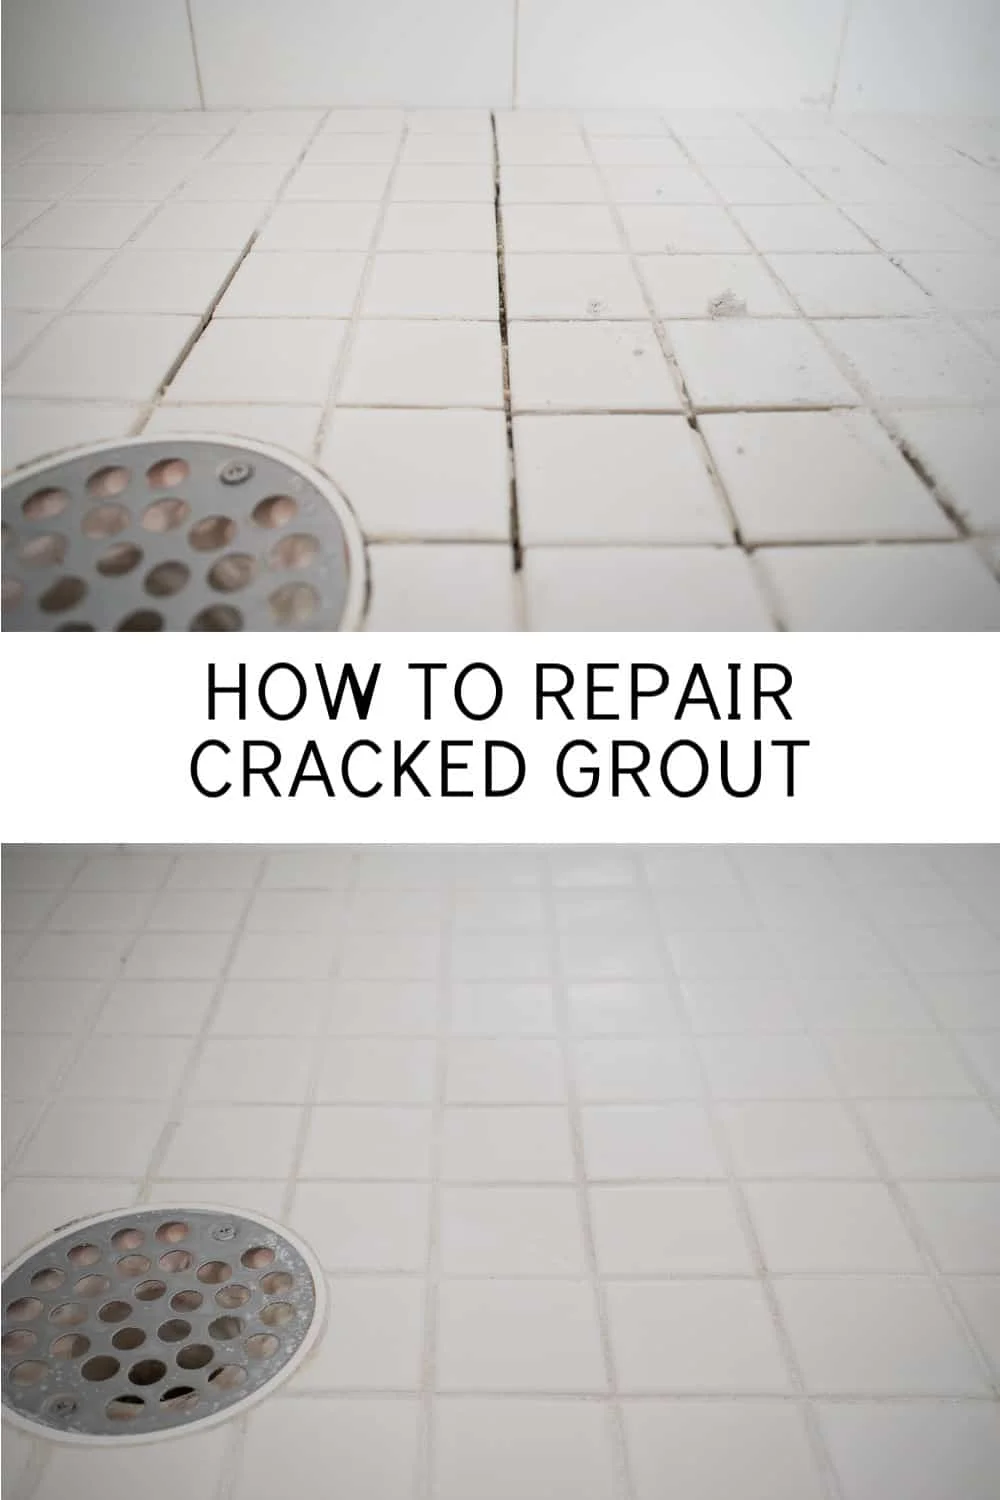
Understanding Grout Cracks in Bathroom Tiles
Common Causes of Grout Damage
Grout cracks in bathroom tiles are a common issue that can arise due to several factors. One primary cause is loose tiles, often found in areas with high moisture such as kitchens and bathrooms. Over time, grout experiences wear and tear from regular use, with a general recommendation to regrout every 6 to 8 years to maintain integrity. Additionally, stains and cracks can develop between tiles due to water damage, shifting of tiles, or improper initial installation.
Types of Cracks and Their Severity
Grout cracks can vary in size and impact. Fine hairline cracks are often cosmetic and may not immediately compromise the tile installation, while larger gaps or crumbling grout can indicate more serious underlying issues such as tile movement or water infiltration. Understanding the severity helps determine whether a simple repair will suffice or if more extensive regrouting or professional intervention is necessary.
Preparing for DIY Grout Repair
Essential Tools and Materials Needed
Before starting a grout repair project, gather all necessary tools and materials to ensure a smooth process. Essential items include:
- Grout saw for removing old grout
- Grout float to apply new grout evenly
- Grout sponge for cleaning excess grout
- Mixing bucket for preparing grout mixture
- Caulk gun for sealing edges
- Protective gloves to safeguard hands
- Paint and mortar mixer for thorough mixing
- Putty knife for detailed scraping and smoothing
Safety Tips and Precautions
Safety is crucial during grout repair. Open windows to ensure proper ventilation, especially when working with grout and sealants that may emit fumes. Cover surrounding surfaces with tarps or drop cloths to protect against spills and dust. Wearing gloves prevents skin irritation, and using eye protection can shield against debris when removing old grout. Always work carefully to avoid damaging tiles or inhaling dust particles.
Step-by-Step Guide to Repairing Cracked Grout
Removing Old or Damaged Grout
Begin by removing the old grout to allow for better adhesion of the new grout and a smoother finish. Use a grout saw or a specialized grout removal tool to carefully scrape out the damaged grout from between the tiles, taking care not to damage the tile edges. Removing all loose and cracked grout is crucial to prevent future issues such as mold or mildew growth.
Cleaning and Prepping the Tile Surface
After grout removal, clean the gaps and tile surfaces thoroughly to remove dust, debris, and residues. A damp sponge or cloth works well for this step. Ensure the surface is dry before proceeding to grout application to improve bonding. Proper surface preparation enhances the durability and appearance of the repair.
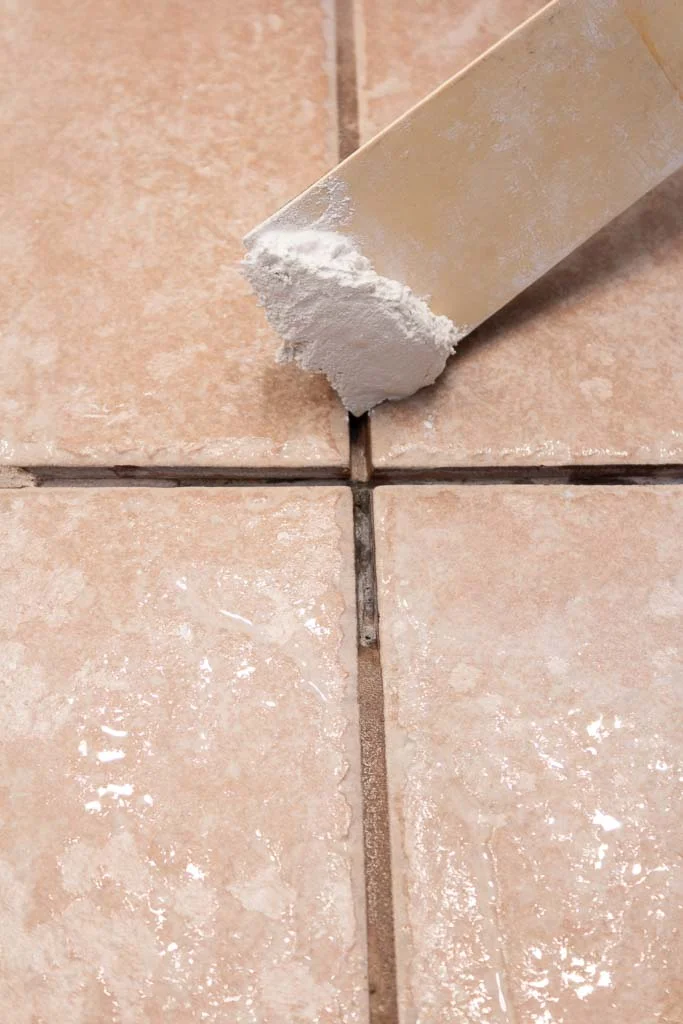
Applying New Grout Correctly
Mix the new grout according to manufacturer instructions. The consistency should resemble fresh cement and should be allowed to sit for about 10 minutes before application to improve workability. Choose the appropriate grout type based on your tile gap width and surface:
- Sanded grout for gaps larger than 1/8 inch
- Unsanded grout for gaps smaller than 1/8 inch
- Acrylic latex grout for sensitive surfaces and wide gaps
Use a grout float to apply the grout diagonally across the tile joints, pressing firmly to fill gaps completely. Remove excess grout with a damp sponge before it hardens to avoid residue buildup.
Sealing the Grout for Longevity
Allow the grout to harden fully, which typically takes between 24 to 78 hours depending on environmental conditions. Once hardened, apply a grout sealer to protect against moisture, stains, and mildew. Wiping away any excess grout residue before sealing ensures better adhesion and a clean finish. Proper sealing significantly extends the lifespan of your grout repair.
Maintaining Your Bathroom Tiles Post-Repair
Regular Cleaning Techniques
Keeping grout in good condition after repair involves routine cleaning. Use gentle, non-abrasive cleaners and a soft brush or sponge to remove dirt and prevent the buildup of mold and mildew. Avoid harsh chemicals that can degrade grout sealants. Wiping down tiles after shower use helps reduce moisture accumulation, further protecting grout integrity.
Preventing Future Grout Damage
To prevent grout from cracking again, maintain proper ventilation to reduce humidity and moisture buildup in the bathroom. Fix any loose tiles promptly and inspect grout lines periodically for early signs of damage. Avoid using heavy or sharp objects that may cause tile displacement or grout wear. Following these proactive steps can significantly extend the life of your grout and tiles.
Troubleshooting Common Issues During Grout Repair
Dealing with Uneven Grout Lines
Uneven grout lines often occur when old grout is not completely removed or when grout is applied inconsistently. To fix this, remove any improperly applied grout and reapply carefully using a grout float, ensuring grout is pressed firmly and evenly into the joints. Smooth out lines with a grout sponge while the grout is still wet to achieve a uniform appearance.
Fixing Grout That Cracks Again
If grout cracks reappear after repair, it may be due to improper removal of old grout, incorrect grout type usage, or underlying tile movement. In such cases, remove the faulty grout entirely and consider switching to a more suitable grout type. If structural issues are suspected, consulting a professional may be necessary to prevent recurring damage and ensure a long-lasting solution.

